Galentine's Valentine's Day Cake
Highlighted under: Celebration Food Recipes
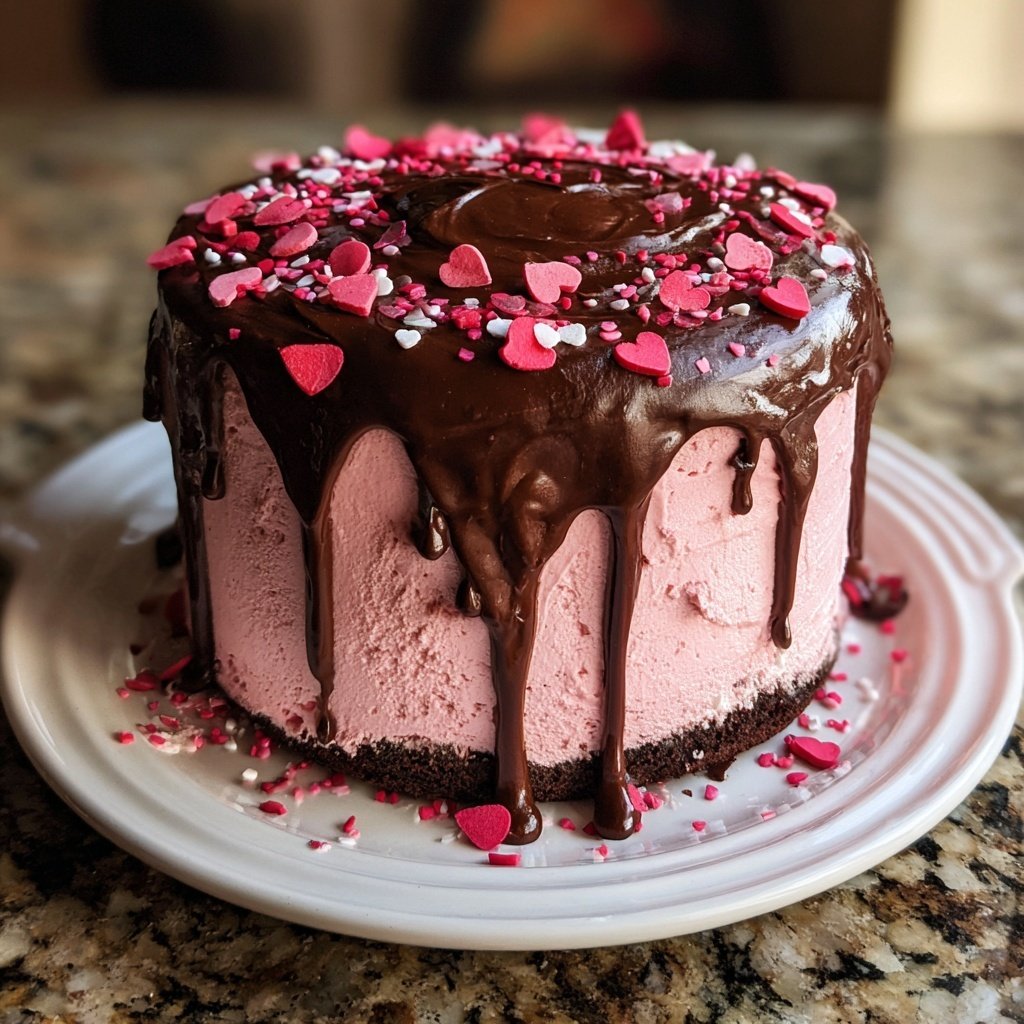
I love celebrating Galentine's Day with my friends, and this cake is the perfect centerpiece for our festivities! The vibrant layers of red velvet, fluffy cream cheese frosting, and playful sprinkles create a joyful treat that everyone will adore. I've poured my heart into this recipe, ensuring it’s easy to make yet impressively beautiful. Whether you're having a small get-together or a larger party, this cake captures the spirit of friendship and love in every slice. Let’s whip up something special together!
When I first baked this Galentine's Valentine's Day Cake, I wanted to craft something that not only showcased my love for my friends but also brought joy to the occasion. The rich flavor of red velvet combined with the tangy cream cheese frosting was an instant hit. I've learned that using buttermilk gives the cake an incredibly tender crumb; trust me, it’s a game-changer!
As I layered the cakes, I couldn't help but smile at the bright colors and festive sprinkles. It's a delightful cake that's easy to adapt for any occasion, whether you’re celebrating friendship or simply indulging in something sweet. My tip? Let the cake chill before frosting for a cleaner finish!
Why You'll Love This Cake
- Decadent red velvet flavor that’s always a winner
- Luxurious cream cheese frosting that complements perfectly
- A fun and colorful cake ideal for celebrating friendship
Understanding Red Velvet
Red velvet cake is distinct not only for its vibrant color but also for its unique flavor profile, which comes from a combination of cocoa powder and buttermilk. The acidity of the buttermilk helps to create a tender crumb while also enhancing the chocolate flavor. Be sure to use fresh buttermilk as it is crucial for the cake's moisture and texture; if you're out of buttermilk, you can substitute with milk mixed with a tablespoon of vinegar or lemon juice.
The inclusion of red food coloring is what truly sets this cake apart visually. However, quality matters! Gel food coloring will give you a rich hue without altering the batter's consistency, unlike liquid colors that can add extra moisture. If you're looking for a fun twist, experimenting with natural colorants like beet juice or pomegranate concentrate can provide not only color but also intriguing flavors.
Frosting Tips for Perfection
Achieving the perfect cream cheese frosting is all about temperature and mixing technique. Start with your butter and cream cheese at room temperature—this helps them blend seamlessly. I recommend beating the butter first until it's fluffy and pale before adding in the cream cheese. This prevents any lumps and creates a smooth and airy frosting that's easy to spread.
To avoid a grainy texture in your frosting, sift your powdered sugar before adding it in. Not only does this eliminate lumps, but it will also help create a glossy finish that beautifully coats your cake. If you prefer a less sweet frosting, you can decrease the sugar amount slightly and add a touch more cream cheese, keeping in mind that this may affect the frosting's stability.
Decorating and Serving Suggestions
When it comes to decorating your Galentine's cake, don't be afraid to be creative! Use a combination of different colored sprinkles to reflect the lively spirit of Galentine's Day. For a more polished look, try a smooth frosting technique called the 'naked cake' style—just apply a thin layer of frosting around the sides so that some of the cake peeks through, then finish with sprinkles on top.
As for serving, this cake pairs wonderfully with a cup of coffee or a glass of sparkling wine, perfect for a celebratory gathering. For those who want to make it ahead, the cake layers can be baked and stored wrapped in plastic wrap at room temperature for up to 2 days or frozen for a month. Just make sure to frost just before serving to maintain the fresh texture and taste of the frosting.
Ingredients
Ingredients
For the Cake
- 2 1/2 cups all-purpose flour
- 1 1/2 cups sugar
- 1 teaspoon baking powder
- 1 teaspoon baking soda
- 1 teaspoon salt
- 1 tablespoon cocoa powder
- 1 1/2 cups vegetable oil
- 1 cup buttermilk, room temperature
- 2 large eggs
- 2 tablespoons red food coloring
- 1 teaspoon vanilla extract
- 1 teaspoon white vinegar
For the Cream Cheese Frosting
- 1 cup unsalted butter, softened
- 16 oz cream cheese, softened
- 4 cups powdered sugar
- 1 teaspoon vanilla extract
For Decoration
- Sprinkles
- Edible glitter (optional)
Instructions
Instructions
Steps
Preheat the Oven
Preheat your oven to 350°F (175°C) and grease and flour two 9-inch round cake pans.
Mix Dry Ingredients
In a large bowl, whisk together the flour, sugar, baking powder, baking soda, salt, and cocoa powder.
Combine Wet Ingredients
In another bowl, combine the oil, buttermilk, eggs, food coloring, vanilla extract, and vinegar. Whisk until well mixed.
Combine Mixtures
Gradually add the wet ingredients to the dry ingredients, mixing until just combined.
Bake
Divide the batter evenly between the prepared pans and bake for 25-30 minutes, or until a toothpick inserted comes out clean.
Cool the Cakes
Allow the cakes to cool in the pans for 10 minutes before transferring to wire racks to cool completely.
Prepare the Frosting
In a large bowl, beat the softened butter and cream cheese until smooth. Gradually add the powdered sugar and vanilla, beating until fluffy.
Assemble the Cake
Once the cakes are cool, place one layer on a cake stand, spread a layer of frosting, then top with the second layer. Frost the top and sides of the cake.
Decorate
Finish the cake with sprinkles and edible glitter, if desired. Slice and serve!
Enjoy your delicious Galentine's Valentine's Day Cake with friends!

Pro Tips
- For a more intense flavor, let the frosted cake sit in the refrigerator for a couple of hours before serving. This allows the flavors to meld beautifully.
Storage and Make-Ahead
To keep your red velvet cake fresh, store any leftover slices in an airtight container in the refrigerator for up to a week. If you want to enjoy this cake later, it freezes beautifully. Wrap individual slices in plastic wrap and then place them in a freezer-safe bag. They can last up to three months; just thaw them in the fridge overnight before enjoying.
If you're planning to make this cake ahead of time, consider preparing the cake layers and frosting separately. You can assemble the cake up to a day in advance and store it in the refrigerator, allowing the frosting to set up nicely and the flavors to meld together for an even tastier treat.
Scaling the Recipe
Should your gathering require a larger cake, this recipe can easily be doubled. Just make sure that you use a large enough mixing bowl to accommodate the increased ingredients. Additionally, be mindful when adjusting cooking times; larger cakes typically take longer to bake. Always check doneness with a toothpick inserted in the center, and if it's a bit underdone, give it 5 more minutes, but no more than that to avoid drying out.
Conversely, if you wish to make a smaller cake, consider halving the recipe and baking it in smaller 6-inch round pans. This smaller version could be perfect for an intimate Galentine's Day celebration, or you could try making cupcakes using the same batter—a fun, individual treat everyone can enjoy!
Questions About Recipes
→ Can I use other colors instead of red?
Absolutely! Feel free to use any food coloring to match your occasion.
→ How can I make the cake less sweet?
You can reduce the amount of sugar in both the cake and frosting slightly.
→ Can I make this cake ahead of time?
Yes, you can bake the layers in advance and freeze them. Just make sure to wrap them well.
→ What’s the best way to store leftovers?
Store the cake in an airtight container in the refrigerator for up to 5 days.
Galentine's Valentine's Day Cake
Created by: The Chefwoven Team
Recipe Type: Celebration Food Recipes
Skill Level: Intermediate
Final Quantity: 8 servings
What You'll Need
For the Cake
- 2 1/2 cups all-purpose flour
- 1 1/2 cups sugar
- 1 teaspoon baking powder
- 1 teaspoon baking soda
- 1 teaspoon salt
- 1 tablespoon cocoa powder
- 1 1/2 cups vegetable oil
- 1 cup buttermilk, room temperature
- 2 large eggs
- 2 tablespoons red food coloring
- 1 teaspoon vanilla extract
- 1 teaspoon white vinegar
For the Cream Cheese Frosting
- 1 cup unsalted butter, softened
- 16 oz cream cheese, softened
- 4 cups powdered sugar
- 1 teaspoon vanilla extract
For Decoration
- Sprinkles
- Edible glitter (optional)
How-To Steps
Preheat your oven to 350°F (175°C) and grease and flour two 9-inch round cake pans.
In a large bowl, whisk together the flour, sugar, baking powder, baking soda, salt, and cocoa powder.
In another bowl, combine the oil, buttermilk, eggs, food coloring, vanilla extract, and vinegar. Whisk until well mixed.
Gradually add the wet ingredients to the dry ingredients, mixing until just combined.
Divide the batter evenly between the prepared pans and bake for 25-30 minutes, or until a toothpick inserted comes out clean.
Allow the cakes to cool in the pans for 10 minutes before transferring to wire racks to cool completely.
In a large bowl, beat the softened butter and cream cheese until smooth. Gradually add the powdered sugar and vanilla, beating until fluffy.
Once the cakes are cool, place one layer on a cake stand, spread a layer of frosting, then top with the second layer. Frost the top and sides of the cake.
Finish the cake with sprinkles and edible glitter, if desired. Slice and serve!
Extra Tips
- For a more intense flavor, let the frosted cake sit in the refrigerator for a couple of hours before serving. This allows the flavors to meld beautifully.
Nutritional Breakdown (Per Serving)
- Calories: 380 kcal
- Total Fat: 26g
- Saturated Fat: 15g
- Cholesterol: 195mg
- Sodium: 85mg
- Total Carbohydrates: 32g
- Dietary Fiber: 3g
- Sugars: 24g
- Protein: 6g